In this Lightning Bits episode, William and Sebastian discuss Virtual Environments and the benefits of having dedicated spaces on your computer for focused and shared work. Watch the video, or continue reading below.
Environments
There are many ways we can set up a virtual environment: Virtualenv, Anaconda, Miniconda, Mini-forge, and several others.
Here, we are going to focus on miniconda and conda-forge.
A note about Miniconda vs Mini-forge
You can think of Miniconda as a mini version of the Anaconda, which is a Python distribution that comes with many packages pre-installed. The main tool in Anaconda & Miniconda is the so-called conda environment and package manager. It is a tool for creating new virtual environments and installing packages.
Now, Mini-forge is a community-maintained repository for conda-compatible packages. Using either miniconda or conda-forge is fine as the conda commands are identical.
William happily uses Miniconda while Sebastian prefers mini-forge, but as mentioned above, both William and Sebastian use the exact same conda commands.
Installing Miniconda
We recommend visiting the official Miniconda website to find the latest information on installing Miniconda for your machine and operating system. For example, as of this writing, Sebastian would select one of the two following options to install Miniconda on his MacBook, which has an ARM-based M1 chip:
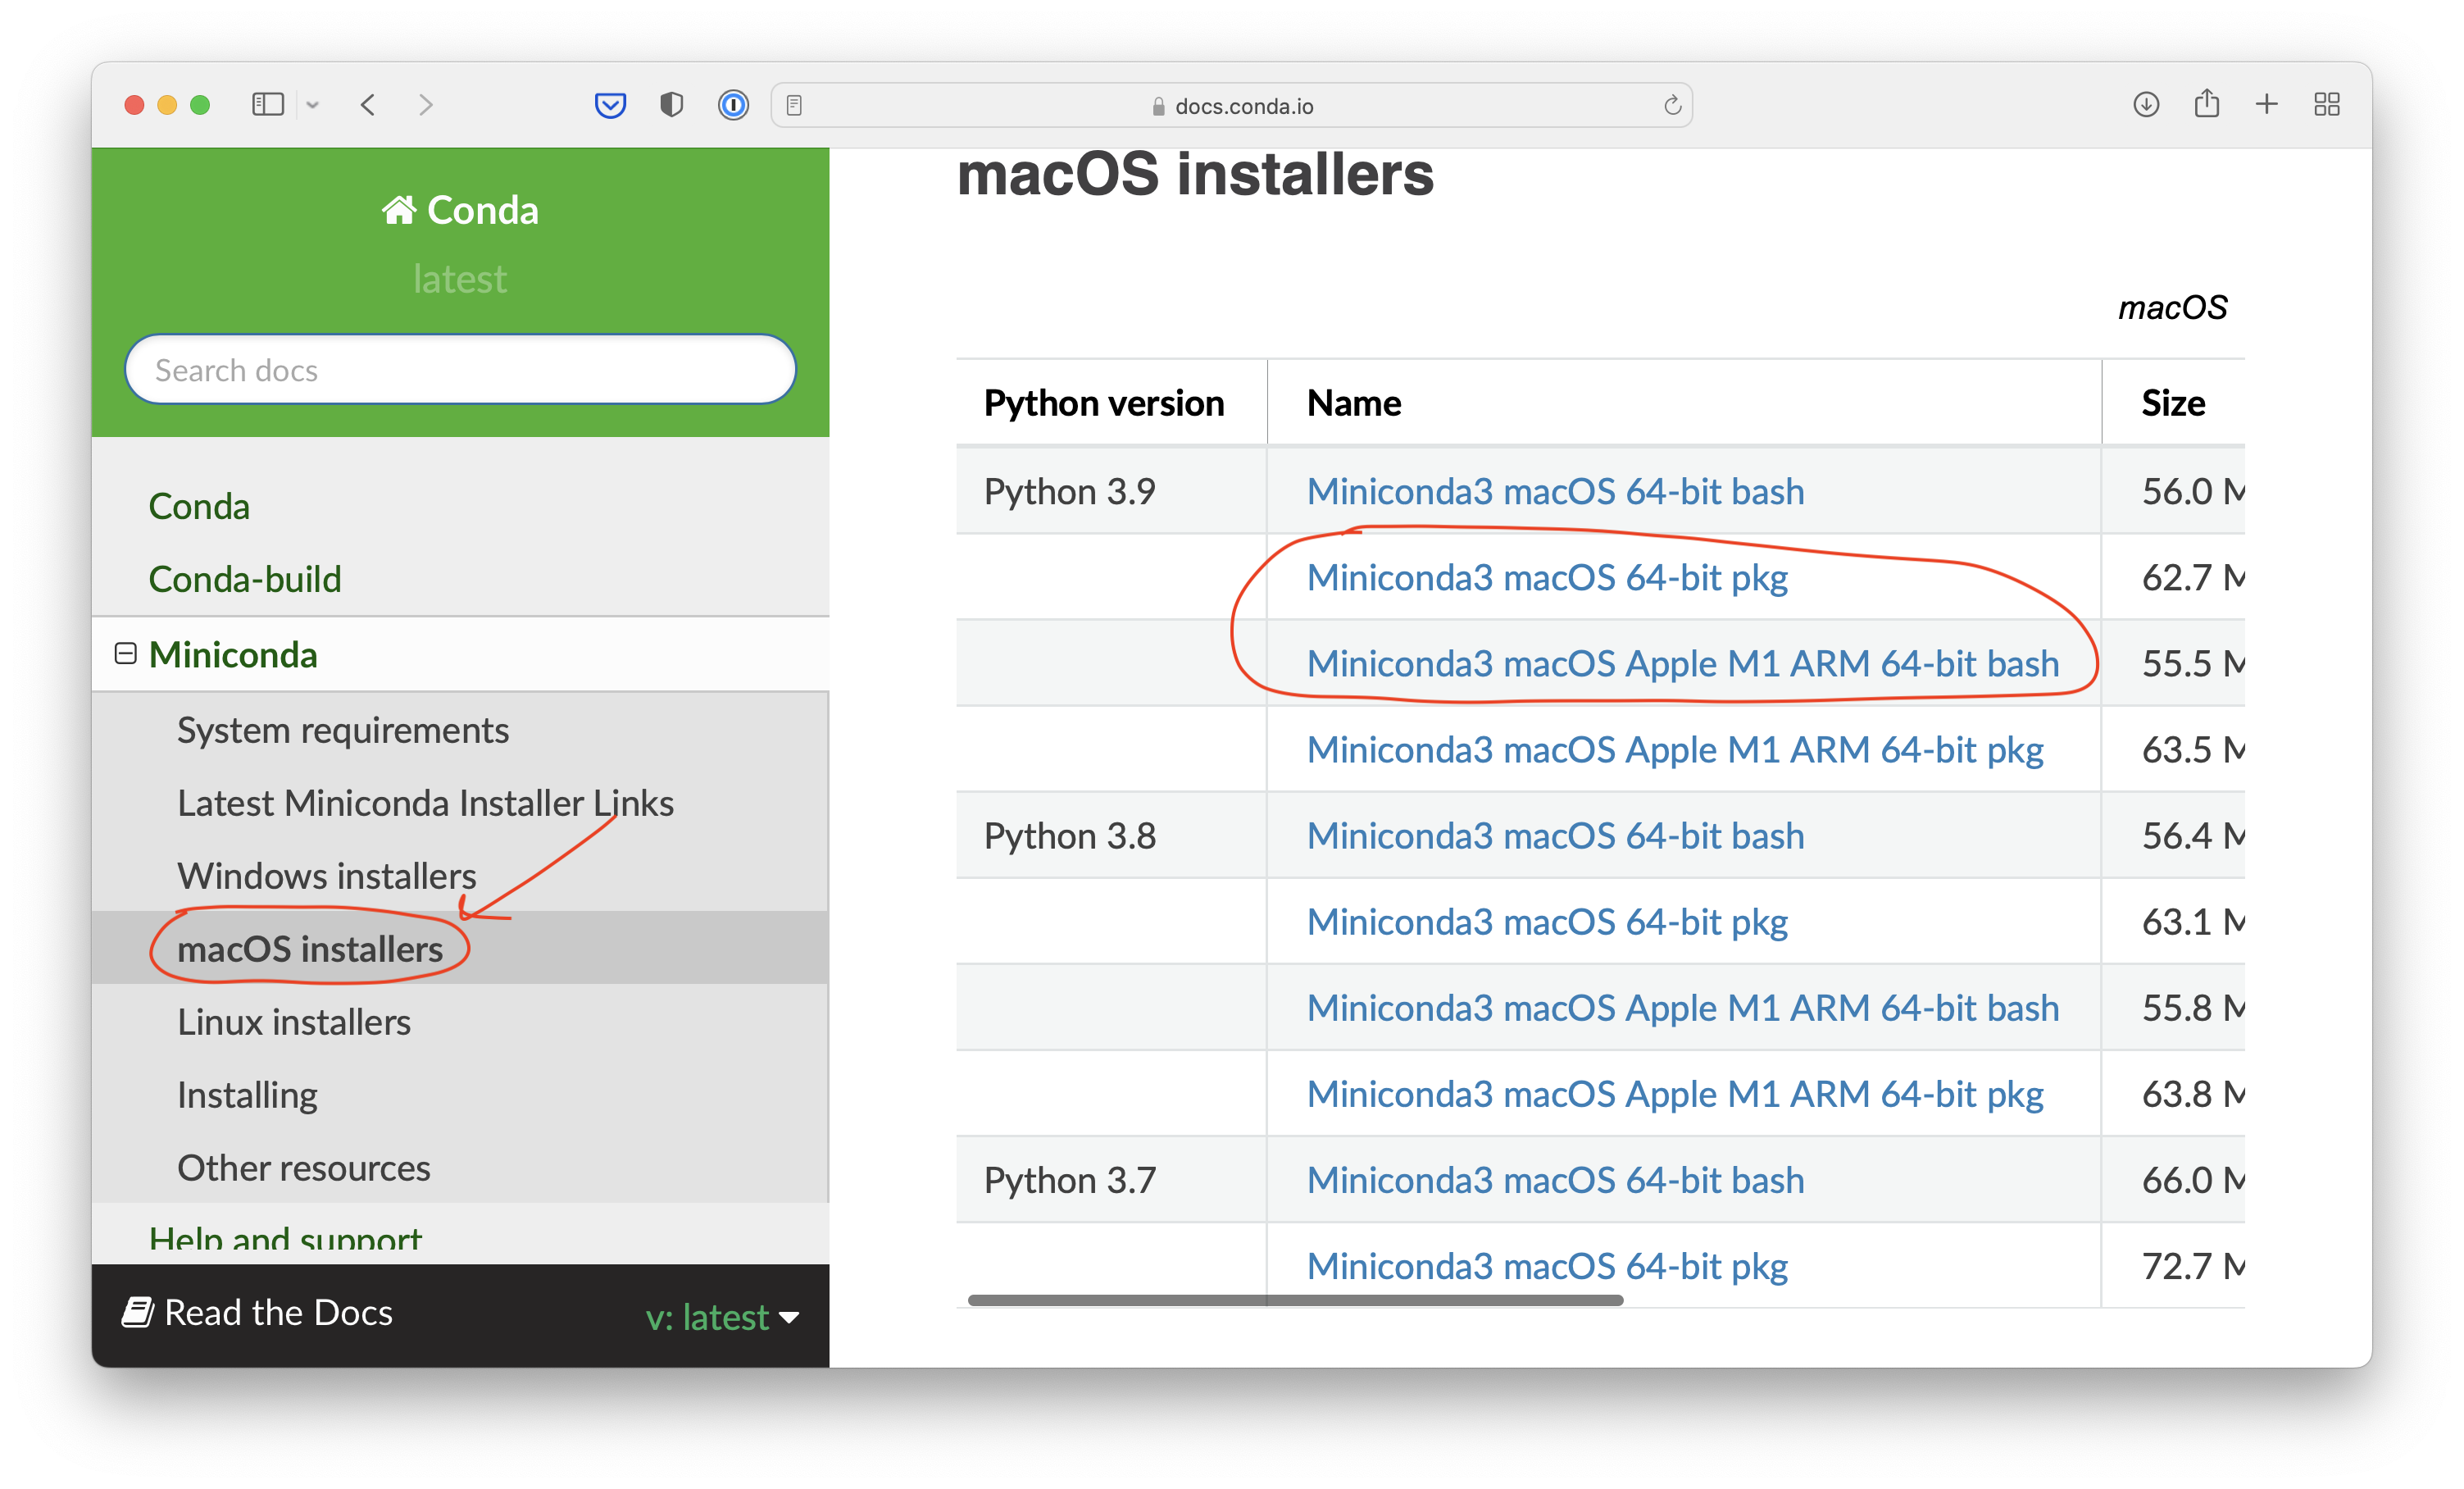
Note that you can either choose the pkg or bash file installer. The pkg installer guides you through an interactive UI whereas the bash installer requires you to install Miniconda from your command line terminal.
- If you download the
pkgfile, just double-click the downloaded file and follow the instructions. - If you download the `bash file, go to your terminal, type
bash Miniconda3-py39_4.12.0-MacOSX-arm64.sh
and follow the instructions that will be shown in the terminal. Note that the exact file name may differ based on which version of the bash installer you downloaded. Also, make sure you cded into the folder containing the installer file for this to work.
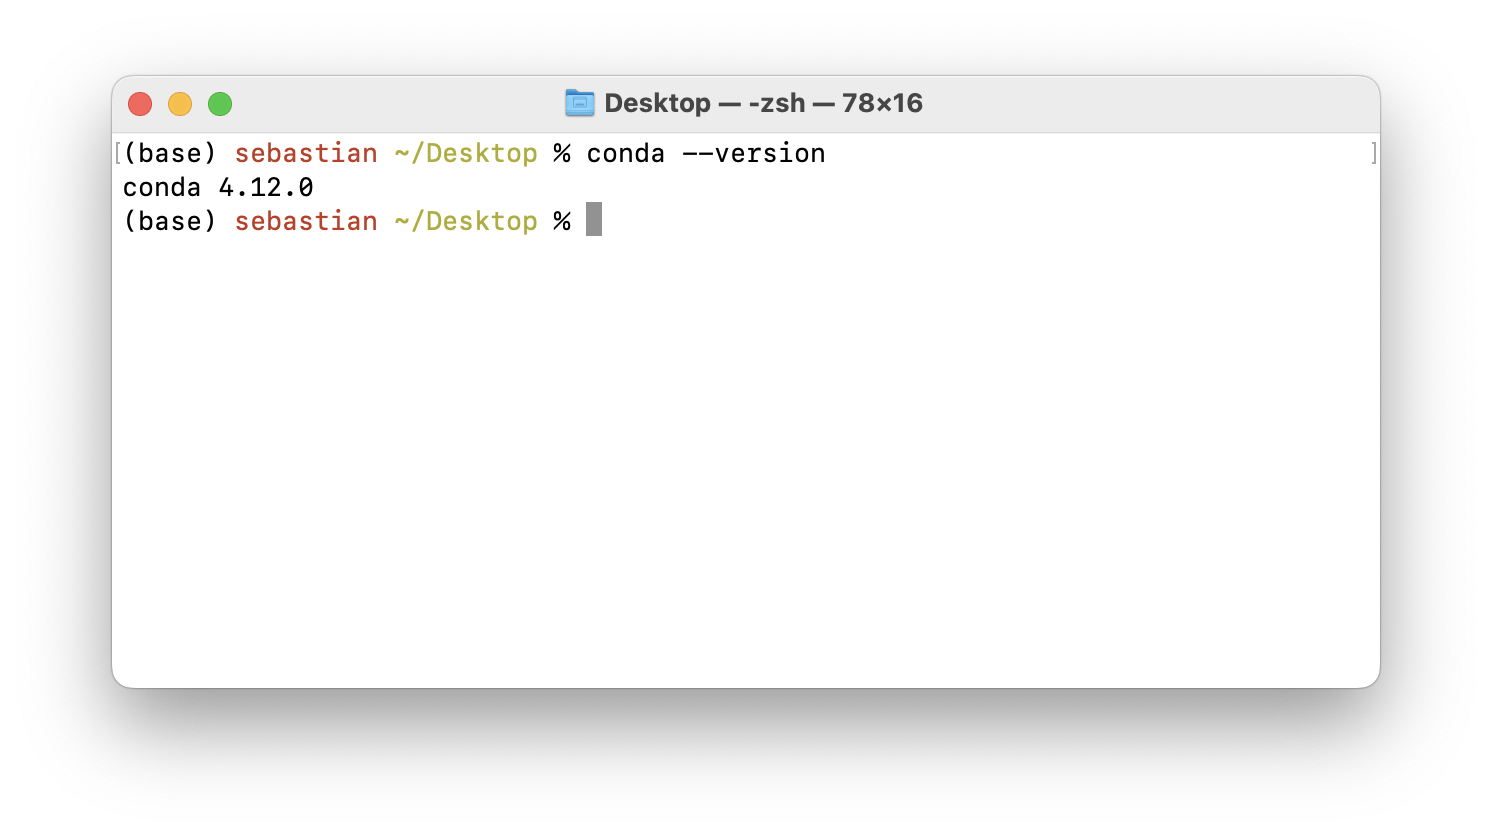
Checking the Installation
After installing Miniconda, you can open a new terminal and check if it was successfully installed by running conda --version. If it was correctly installed, you should see the current version number of conda, for example, as shown below:
Useful conda & pip Commands
Check what environments are currently installed on your computer:
conda env list
Create a new environment called course_1:
conda create --name course_1 python=3.7
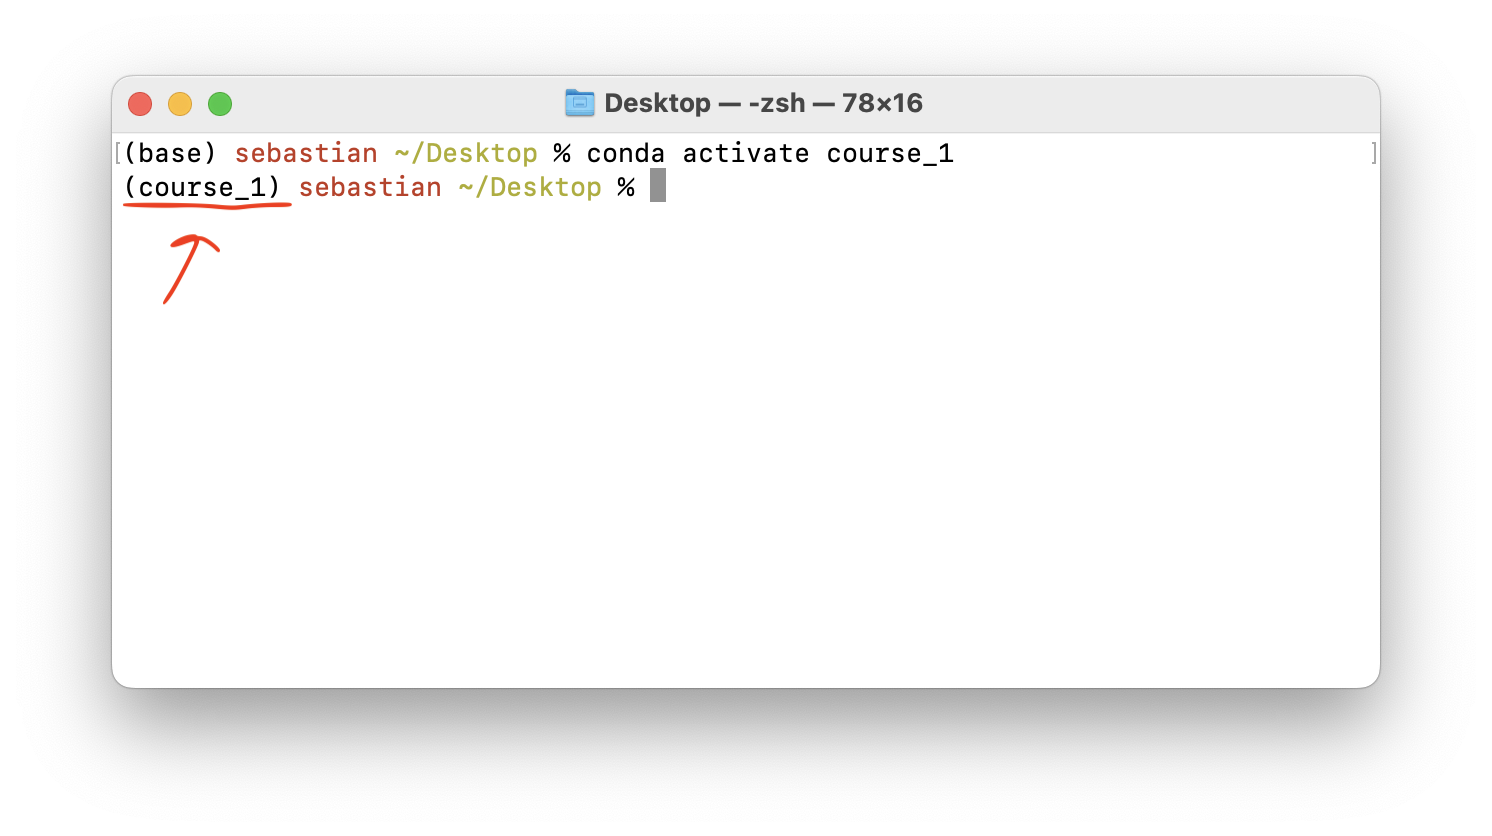
Activate an environment:
conda activate course_1
Tip: the active environment is usually indicated at the beginning of the terminal prompt as shown in the screenshot below:
List all packages currently installed in the active environment:
pip freeze
To save the requirements list to a requirements.txt file, you can use the > symbol:
pip freeze > requirements.txtInstall new packages with pip
pip install pytorch-lightning
Alternatively, installing directly with conda would look like as follows:
conda install pytorch-lightning -c conda-forge
Install packages from a requirements.txt file:
pip install -r requirements.txt
Bonus: Exporting an Environment Using conda
Instead of using pip freeze, you can also use conda to snapshot your environment. For instance, you can run the following command to create an environment.yml YAML file:
conda env export > environment. yml
Then, you can share the environment. yml, and someone with the file can recreate the environment using the following command:
conda env create --file environment.yml
Alternatively, you want to install the packages from environment.yml into an existing environment, you can use the update command as follows:
conda env update --file environment.yml
Bonus: Checking Your Current Environment in Jupyter Notebooks
When you create a new environment, it is a good idea to install Jupyter Notebook/Lab into that environment as well — this ensures that you don’t accidentally launch a Jupyter Notebook/Lab instance attached to a different environment.
To conveniently check your current computer specs, conda environment, and the installed packages, Sebastian developed the handy watermark extension.
After installing watermark as follows
pip install watermark
you can get various information about your computer and environment as shown in the screenshots below:

Stay tuned for future episodes of Lightning Bits! Also, if you have any questions, please don’t hesitate to reach out on Slack!