Takeaways
Readers will learn how to convert and scale PyTorch models and training loops with Lightning Fabric.Introduction
Some engineers may prefer the greatest amount of control as possible over their PyTorch training loop. Yet, those same engineers also know the benefits of a lightweight, production ready framework that handles the heavy lifting when it comes to SOTA distributed training features.
The Power of Lightning Fabric
Lightning Fabric does this heavy lifting by enabling researchers and machine learning engineers to train PyTorch models at scale – and with minimal code changes. In as few as five lines, Lightning Fabric orchestrates training across multi-GPU and multi-Node environments. Letting you focus on the science behind your model, instead of the engineering.
 The image above shows how easy it is to implement Lightning Fabric into PyTorch training logic. Below we can see where Lightning Fabric fits into the PyTorch ecosystem, in that it is used to train domain specific models in research areas like audio, vision, and text (i.e. LLMs).
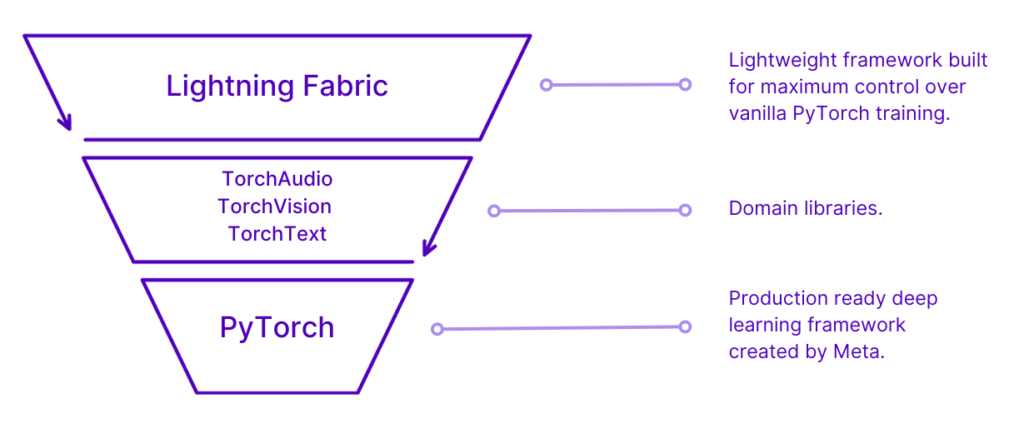
Given the previous image – let’s take note that Lightning Fabric is not a replacement for PyTorch. Instead, Lightning Fabric integrates into vanilla PyTorch training loops. And it does this via a powerful Core API – which we will discuss below.
Lightning Fabric’s Core API
Lightning Fabric has just one Core API class – Fabric. Fabric can be used to configure your environment with arguments like devices, accelerator, strategy. This core class also comes equipped with several methods that accomplish things like launching scripts for distributed training, setting up your model and optimizers, and performing collective operations like broadcasting, gathering, and reducing.
Configuring Environments with the Fabric Class
Shown below are a few of Fabric’s arguments that can be used to configure the training environment.
from lightning.fabric import Fabric
from lightning.fabric.loggers import CSVLogger
fabric = Fabric(
accelerator="auto",
strategy="auto",
devices="auto",
num_nodes=1,
precision="32-true",
logger=CSVLogger(root_dir="lightning-logs"),
)accelerator: supports passing in different accelerator types, like “cpu” or “gpu”strategy: supports passing in different training strategies like “ddp” or “fsdp”devices: takes an int, list, or str with the number of devices or the indices of devicesnum_nodes: the number of cluster nodes for distributed trainingprecision: supports double (64-bit), full (32-bit), or half (16-bit) precisionlogger: supports either CSVLogger or TensorBoardLogger
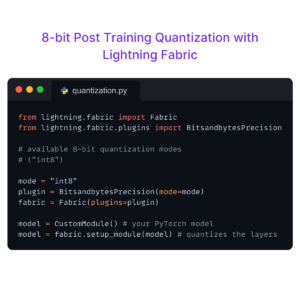
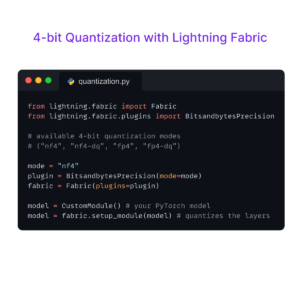
Fabric also has plugins and callbacks arguments. These two arguments allow for us to pass in custom built callbacks, and additional plugins like BitsandbytesPrecision for quantization. If we were to not set any of the arguments from the previous snippet and just use the default configuration, this would look like:
from lightning.fabric.plugins import BitsandbytesPrecision
plugins = [BitsandbytesPrecision(mode="nf4")]
callbacks = [MyCustomCallback()]
fabric = Fabric(
plugins=plugins,
callbacks=callbacks,
)Using Fabric’s Methods
Fabric’s class methods are used for a range of tasks – including setting up models and data loaders, loading and saving checkpoints, performing gradient clipping, and logging metrics. Let’s check out the four methods we need to scale our PyTorch training loop with Fabric.
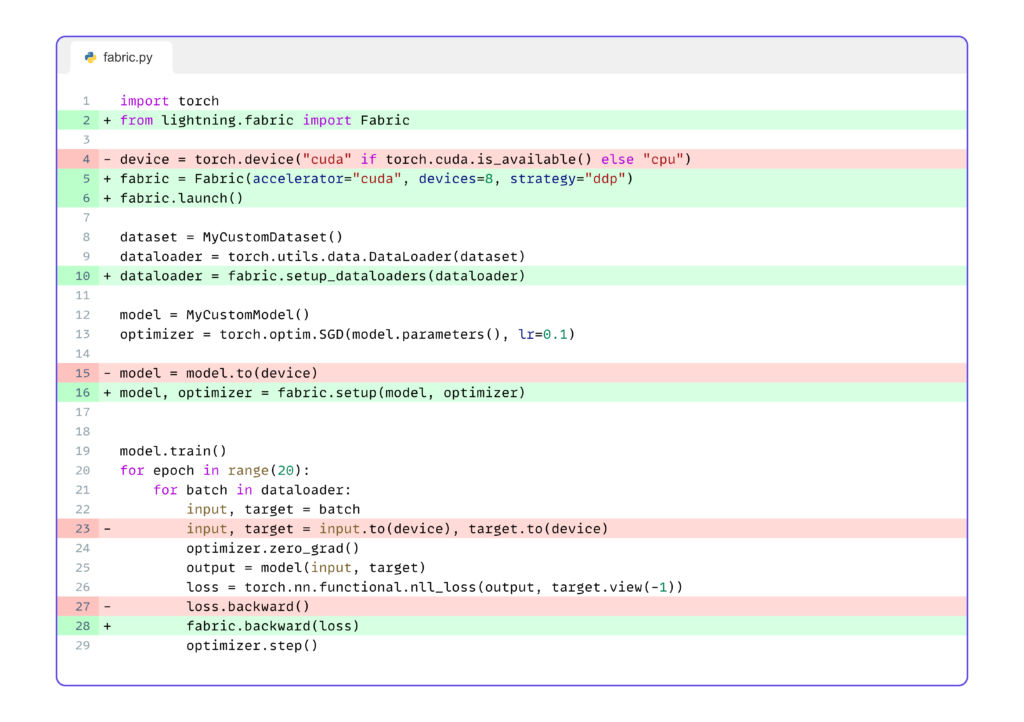
Shown above is our code snippet with the red highlighted lines that we can remove, and the green highlighted lines containing the Fabric code we must add. Note, we also have the line numbers shown – and this lets us know that we will be concentrating on lines 6, 10, 16, and 28 since we have moved on to Fabric’s methods.
We’ve already configured our environment by declaring a fabric object in line 5. Next, in line 6, we need to launch our script or function to multiple processes with the following code:
fabric.launch()After we launch our processes in line 6, we need to set up our data loader, model, and optimizers – as shown in lines 10 and 16. Let’s note that we do not need to explicitly place the model on our device type – this is handled automatically by Fabric.
In order to set up our data loader we need to do the following. First, we read in the dataset and then create a PyTorch Dataloader with that dataset. In the final line, we set up the data loader with fabric.setup_dataloaders. That’s it! Our data loader is now ready for distributed training.
dataset = MyCustomDataset()
dataloader = torch.utils.data.DataLoader(dataset)
dataloader = fabric.setup_dataloaders(dataloader)Now that we’ve prepared our data loader, we need to instantiate and set up our model and optimizer with the following lines of code. First we create model and optimizer objects, and then we pass both of these into fabric.setup. And now our model and optimizers are ready for training at scale!
model = MyCustomModel()
optimizer = torch.optim.SGD(model.parameters(), lr=0.1)
model, optimizer = fabric.setup(model, optimizer)Okay – we’ve prepared our data loader, model, and optimizer – what about the actual training loop? Well, we only need line 28 from the code snippet:
fabric.backward(loss)And when we remove the PyTorch code that we no longer need, our training loop looks like this:
model.train()
for epoch in range(20):
for batch in dataloader:
input, target = batch
optimizer.zero_grad()
output = model(input, target)
loss = torch.nn.functional.nll_loss(output, target.view(-1))
fabric.backward(loss)
optimizer.step()We’re done! Putting it all together for a complete script without the extra PyTorch code is shown below.
import torch
from lightning.fabric import Fabric
fabric = Fabric(accelerator="cuda", devices=8, strategy="ddp")
fabric.launch()
dataset = MyCustomDataset()
dataloader = torch.utils.data.DataLoader(dataset)
dataloader = fabric.setup_dataloaders(dataloader)
model = MyCustomModel()
optimizer = torch.optim.SGD(model.parameters(), lr=0.1)
model, optimizer = fabric.setup(model, optimizer)
model.train()
for epoch in range(20):
for batch in dataloader:
input, target = batch
optimizer.zero_grad()
output = model(input, target)
loss = torch.nn.functional.nll_loss(output, target.view(-1))
fabric.backward(loss)
optimizer.step()Conclusion
Fabric is fast to implement and provides maximum flexibility and control over our training logic. This makes Fabric super easy to adopt and add into existing PyTorch training loops without any need to restructure our code. Leaving the system design and orchestration to us – the engineers – so that we can get the job done in the way that works best for us!
Want to see Lightning Fabric in action? Then clone and install fabric-lab to run the example language transformer using these 4 easy steps from your terminal!
# 1: clone fabric lab
git clone https://github.com/JustinGoheen/fabric-lab.git
cd fabric-lab
# 2: create a virtual environment
python -m venv .venv
source .venv/bin/activate
# 3: install fabric lab
pip install -e ".[text]"
# 4: run the demo
lab run demo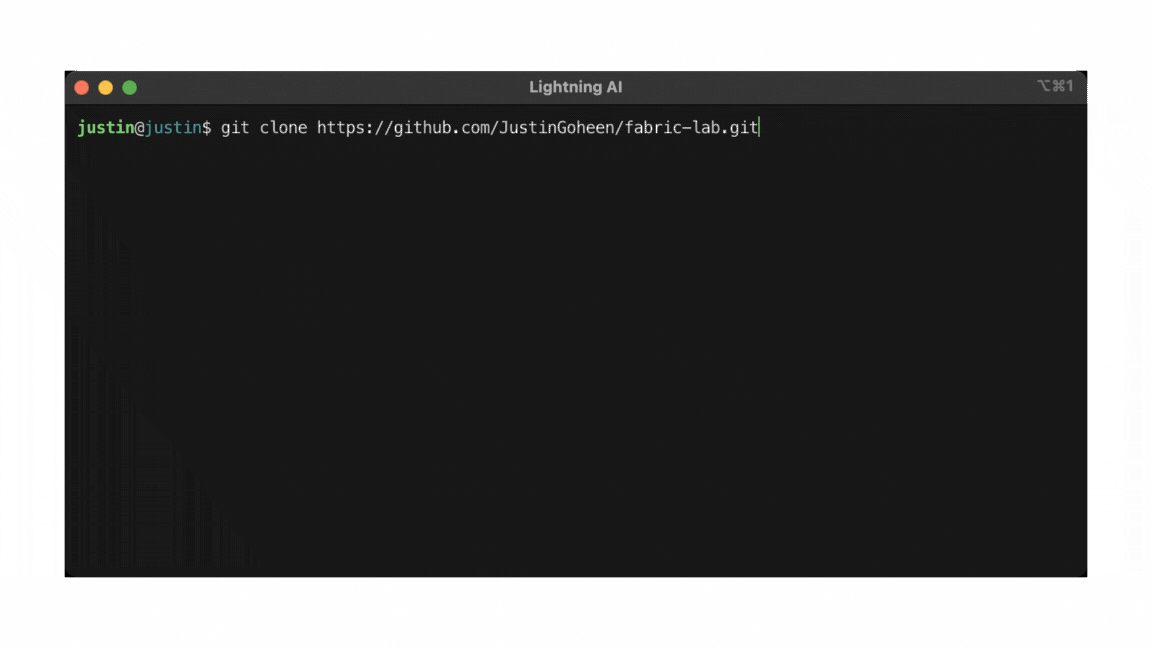
Still have questions?
We have an amazing community and team of core engineers ready to answer questions you might have about the Lightning AI ecosystem. So, join us on Discord or Discourse. See you there!